Rotary encoder কী?
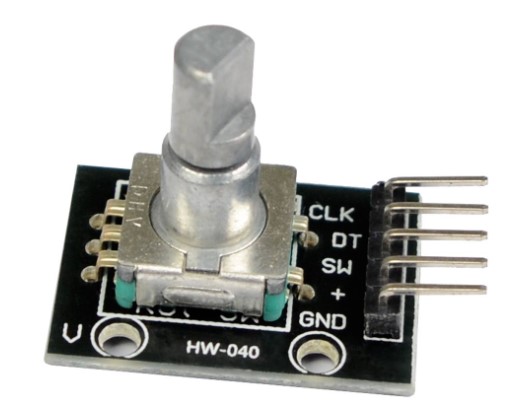
রোটারি এনকোডার হচ্ছে একটি ইলেক্ট্রো-মেক্যানিক্যাল যন্ত্র। যন্ত্রটির একটি নব কিংবা শ্যাফট থাকে। রোটারি এনকোডারের কাজ হল, এই শ্যাফটের অ্যাঙ্গুলার পজিশনকে ইলেক্ট্রিক্যাল সিগন্যালে রুপান্তর করা। একটি রোটারি এনকোডার দেখতে সাধারণত নিচের ছবির মত হয়।
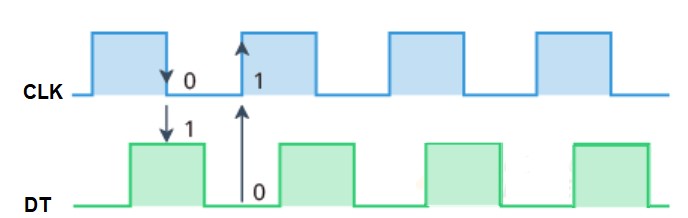
এনকোডারের নব ঘোরানোর সাথে সাথে CLK এবং DT পিনে দুটি পালস সিগন্যাল উৎপন্ন হয়। নবটি যখন ঘড়ির কাঁটার দিকে ঘোরানো হয়, তখন CLK এবং DT এর মান থাকে পরস্পরের বিপরীত। নিচের ছবির মতন। অর্থ্যাৎ, CLK=0 হলে DT=1 হবে। CLK=1 হলে DT=0 হবে।
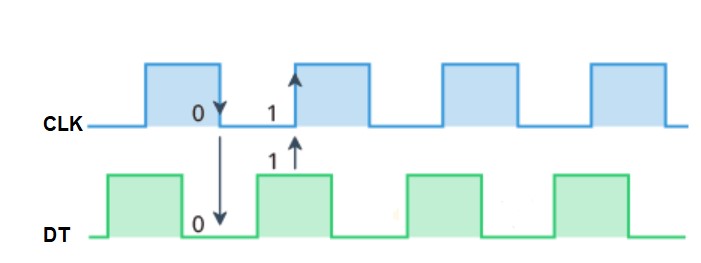
নবটি যখন ঘড়ির কাঁটার বিপরীত দিকে ঘোরানো হয়, তখন CLK এবং DT এর মান পরস্পরের সমান হয়। অর্থ্যাৎ, উভয়টিই 0 অথবা 1 হবে। নিচের ছবির মত।
CLK এবং DT পিনদুটিকে আরডুইনোর দুটি ডিজিটাল পিনের সাথে কানেক্ট করা হবে। আরডুইনো পর্যবেক্ষন করবে উক্ত ডিজিটাল পিনদুটির ডিজিটাল ভ্যালু কখন সমান এবং কখন ভিন্ন। এটা থেকেই আরডুইনো বুঝতে পারবে, রোটারি এনকোডারের নব ক্লকওয়াইজ ঘোরানো হয়েছে নাকি এন্টি-ক্লকওয়াইজ ঘোরানো হয়েছে।
| প্রয়োজনীয় যন্ত্রপাতি | পরিমাণ | লিংক |
| Arduino UNO/Mega 2560 | 1 | Link |
| LED-white | 1 | Link |
| Resistor 110 OHM, ¼ W | 1 | Link |
| Rotary encoder module | 1 | Link |
| Male to female jumpers | 4 | Link |
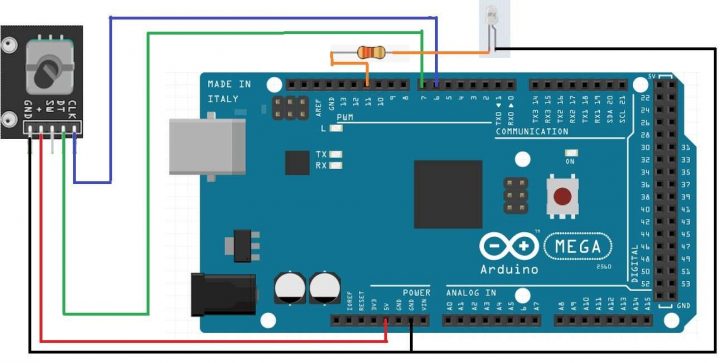
সার্কিট কানেকশন চার্টঃ
| Rotary encoder module | LED | LED Arduino UNO-R3 |
| + | 5V | |
| GND | GND | GND |
| CLK | 6 | |
| DT | 7 | |
| +(Through 300 ohm resistor ) | 11 |
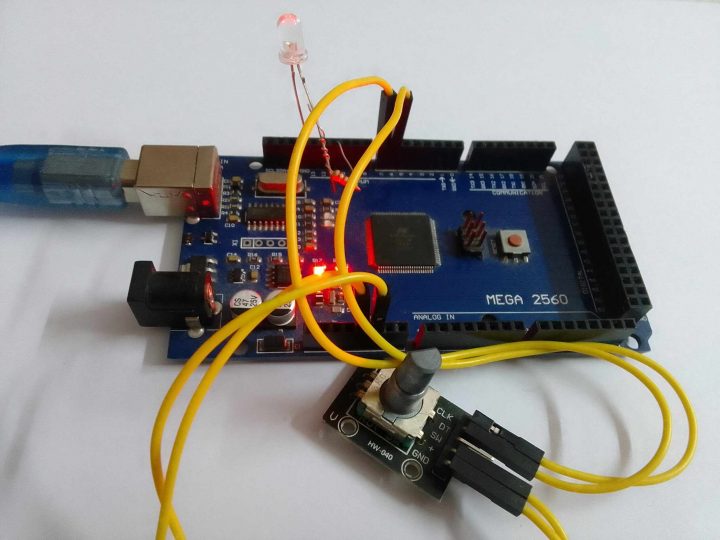
আমাদের সেটআপটি ছিল নিচের ছবির মত।
কোডঃ
নিচের কোডটি আরডুইনোতে আপলোড করুন।
#define CLK 6
 #define DT 7
#define LED 11

 int counter = 0;
 int CLKState;
 int CLKLastState;

 void setup() {
   pinMode (CLK,INPUT);
   pinMode (DT,INPUT);

   Serial.begin (9600);
   // Reads the initial state of the outputA
   CLKLastState = digitalRead(CLK);
 }

 void loop() {
  CLKState = digitalRead(CLK); // Reads the "current" state of the outputA
   // If the previous and the current state of the outputA are different, that means a Pulse has occured
   if (CLKState != CLKLastState){
     // If the outputB state is different to the outputA state, that means the encoder is rotating clockwise
     if (digitalRead(DT) != CLKState) {
       counter ++;
         if(counter>255)
       {
        counter=255;
       }
       analogWrite(LED,counter);


     } else {
       counter --;
         if(counter<0)
       {
        counter=0;
       }
       analogWrite(LED,counter);
     }
     Serial.print("Brightness: ");
     Serial.println(counter);
   }
   CLKLastState = CLKState; // Updates the previous state of the outputA with the current state
 }
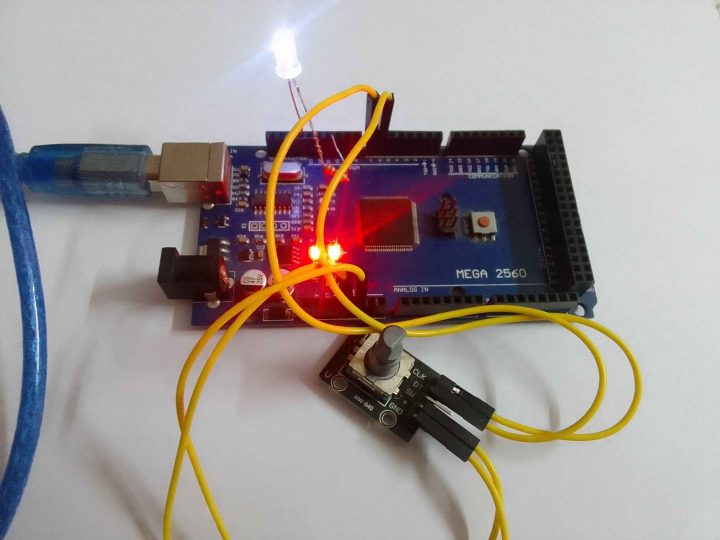
পরীক্ষাঃ
রোটারি এনকোডারের নব ডান দিকে ঘোরালে এলইডির উজ্জ্বলতা বাড়বে।
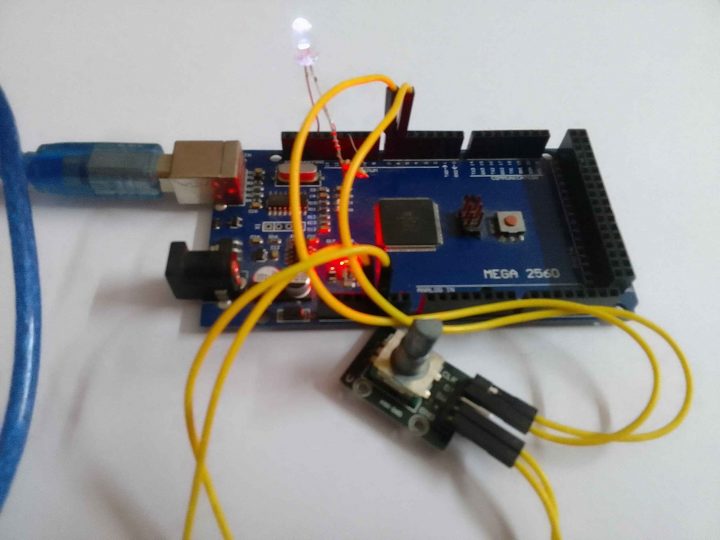
রোটারি এনকোডারের নব বাম দিকে ঘোরালে এলইডির উজ্জ্বলতা কমবে।
এভাবে খুব সহজে Rotary encoder এর মাধ্যমে LED brightness নিয়ন্ত্রণ করা যাবে। প্রজেক্টটি তৈরি করতে প্রয়োজনীয় সকল কম্পোনেন্টের লিংক দেওয়া আছে। চাইলে আপনিও খুব অল্প সময়ে এটা তৈরি করে নিজের দক্ষতা আরও বাড়াতে পারেন, ধন্যবাদ।