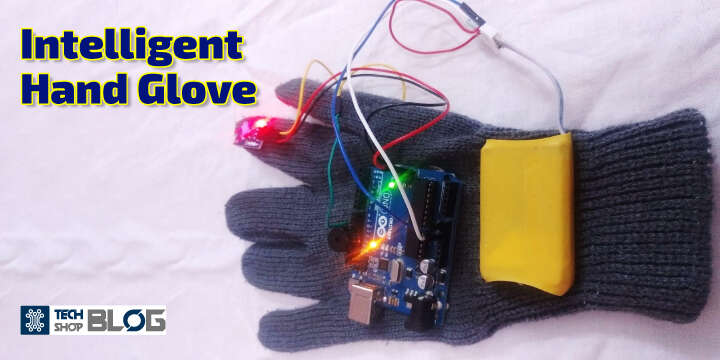
আজকের প্রজেক্টের নাম Intelligent hand glove। এটি তৈরী হবে একটি Arduino UNO এবং আরও কিছু বহুল প্রচলিত কম্পোনেন্ট দিয়ে।
Intelligent hand glove কী ও কেন?
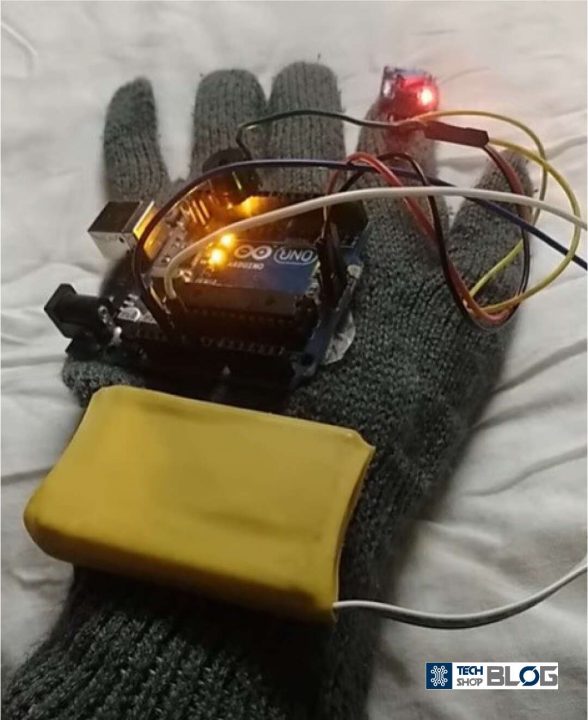
Intelligent hand glove মূলত একটি সার্কিটযুক্ত হাতমোজা । একটি আরডুইনোভিত্তিক ইলেক্ট্রনিক সার্কিট গ্লাভটির সাথে সংযুক্ত থাকে। সার্কিটটি একটি Arduino ,একটি Tilt sensor module ,একটি Buzzer, একটি ব্যাটারি প্যাক এবং কিছু জাম্পার ওয়্যারের সমন্বয়ে তৈরী। Tilt sensor তর্জনী আঙ্গুলের নড়াচড়া অনুভব করতে পারে। আঙ্গুলটি নড়লে Buzzer বাজতে শুরু করবে। প্যারালাইজড রোগী, যারা অন্তঃত একটি আঙ্গুল নাড়াতে পারে, তারা নিজেদের কিছু প্রয়োজন হলে এভাবে Buzzer বাজিয়ে আপনজনদেরকে নিজের কাছে ডাকতে পারে।
প্রয়োজনীয় যন্ত্রপাতিঃ
| প্রয়োজনীয় যন্ত্রপাতি | পরিমাণ | লিংক |
| Arduino UNO-R3 | 1 | Link |
| Tilt sensor | 1 | Link |
| Buzzer | 1 | Link |
| Male to female jumpers | 3 | Link |
| 2S Li-Ion Battery with Charger | 1 | Link |
| Double Sided Tape 1 inch | 1 | Link |
সার্কিট কানেকশনঃ
প্রথমে ব্যাটারি, আরডুইনো এবং টিল্ট সেন্সরকে ডাবল সাইডেড টেপ দিয়ে গ্লাভের সাথে আটকান। তারপর নিচের কানেকশনগুলো সম্পন্ন করুন।
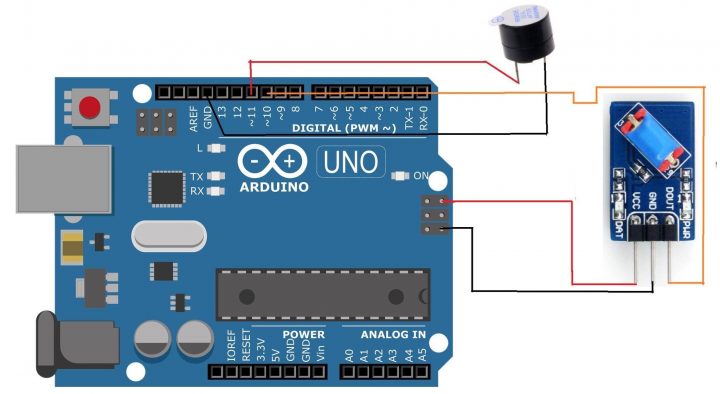
| Arduino UNO- R3 | Tilt switch |
| GND | – |
| 5V | + |
| 10 | DOUT |
| Arduino UNO | Buzzer |
| 11 | + |
| GND | – |

কোডঃ নিচের কোডটি আরডুইনোতে আপলোড করুন।
// constants won't change. They're used here to set pin numbers:

const int sensorPin = 10;     // the number of the sensor pin
const int signalPin =  11;      // the number of the signal pin

// variables will change:
int tiltState = 0;         // variable for reading the sensorpin
void setup() {
  // initialize the singnal pin as an output:
  pinMode(signalPin, OUTPUT);
  // initialize the sensor pin as an input:
  pinMode(sensorPin, INPUT_PULLUP);

  Serial.begin(9600);
}

void loop() {
  // read the state of the sensorpin:
  tiltState = digitalRead(sensorPin);

  // check if the there is water on the rain sensor. If it is, the signalpin is Low:
  Serial.println(tiltState);
  delay(100);
  if(tiltState ==HIGH)
  {
    digitalWrite(signalPin,LOW);

  }

  else
  {
    digitalWrite(signalPin,HIGH);

  }
}
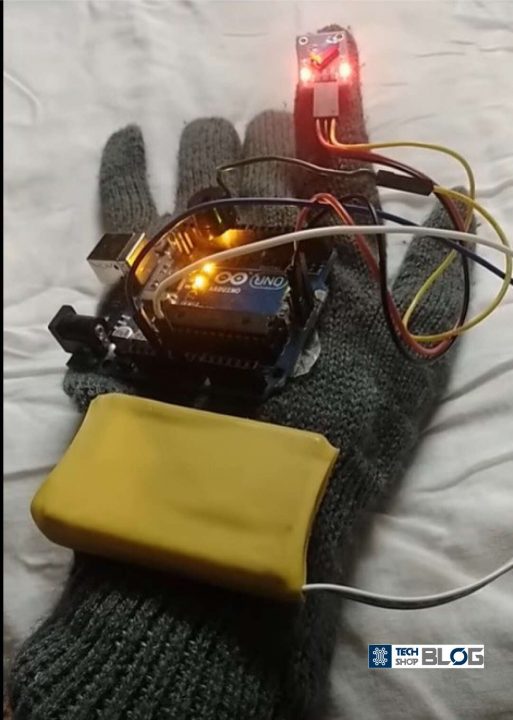
গ্লাভটি হাতে পরুন। আপনার হাতটি কোনো একটি সমতল জায়গায় রাখুন।
আঙ্গুল নাড়ালে বাযারটি বেজে উঠবে। সেই সাথে টিল্ট সেন্সরের DAT চিহ্নিত এলইডি জ্বলে উঠবে।
প্রজেক্টটিকে আরও উন্নত করতে চাইলে Arduino UNO এর বদলে Arduino Lilypad কিংবা Adafruit Flora এবং এগুলোর সাথে কম্প্যাটেবল, কাপড়ে সেলাইযোগ্য সেন্সর ও বাযার ব্যবহার করা উচিৎ। সেক্ষেত্রে জাম্পার ওয়্যারের বদলে conductive thread ব্যবহার করতে হবে। এই ধরণের আরও টিউটোরিয়াল পেতে blog.techshopbd.com এর সাথেই থাকুন।