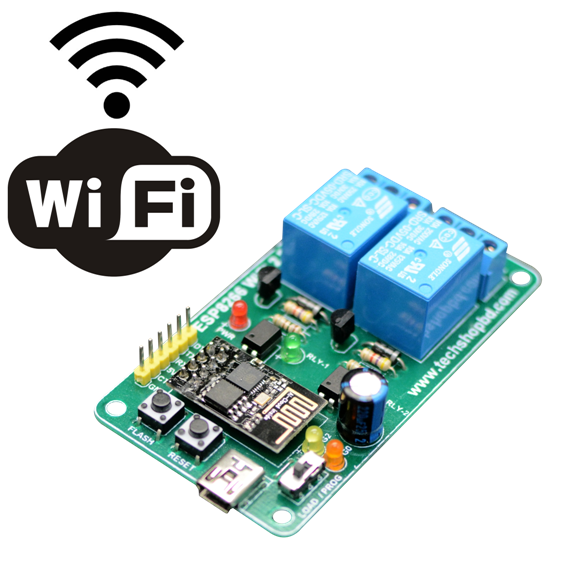
১। প্রোডাক্ট পরিচিতিঃ ESP8266 WiFi 2 Relay Switch একটি IoT Device Controller. এই ডিভাইসকে WiFi দ্বারা নিয়ন্ত্রণ করতে হবে। অর্থাৎ WiFi Router এর সাথে সংযোগ থাকতে হবে রাউটারের Username ও Password এর মাধ্যমে। ডিভাইসটি দ্বারা AC 220 ভোল্ট সম্পন্ন যে কোন লোডকে নিয়ন্ত্রণ করা সম্ভব। যেমনঃ লাইট, ফ্যান ও টেলিভিশন ইত্যাদি। ডিভাসটি ব্যবহার করে সর্বোচ্চ ৭ এম্পিয়ার সম্পন্ন লোড নিয়ন্ত্রণ করা যাবে। ডিভাসটির সাথে একটি Android App দেওয়া আছে যা আপনার মোবাইলে ইন্সটল করে IP দিয়ে Save করে নিতে হবে। App টি সাইট থেকে ডাউনলোড করে নিতে পারবেন। মনে রাখবেন, ডিভাইস এবং মোবাইল একই নেটওয়ার্ক এর আওতায় থাকতে হবে। সাবধানতাঃ AC ২২০ ভোল্ট নিয়ে কাজ করার অভিজ্ঞতা না থাকলে এই ডিভাইস ব্যবহার না করাই উচিৎ।
- Built in Wifi Chip
- 2 Independently Controlled Relays
- Operating Voltage: 5V
- Power Indication: Red LED
- Relay Output Status: Green LED (RLY-1 & RLY-2)
- Board Dimension: 3.20 x 1.72 Inch
- Mounting Holes: 2.90 x 1.45 Inch
- Each relay output capacity: 220VAC / 7A
- Three Terminal Output AC/DC Control (NO-COM-NC)
- Single Pole Double Throw Relay Output (SPDT)
- Relay current consumption at 5V is 72mA each when switched on
- Back EMF protection
| প্রয়োজনীয় যন্ত্রপাতি | পরিমাণ |
| ESP8266 WiFi 2 Relay Switch | ১ টি |
| USB Cable A to Mini B | ১ টি |
| 5V USB Power Supply | ১ টি |
| Android App |
- Arduino IDE
- USB to Serial Converter Driver
| কম্পোনেন্ট | পরিমাণ | Link |
| ESP8266 WiFi 2 Relay Switch | ১ টি | https://goo.gl/KjpmQJ |
| FTDI USB to Serial Converter 3V3-5V | ১ টি | https://goo.gl/YHxJMB |
| USB Cable A to Mini B | ১ টি | |
| 5V USB Power Supply | ১ টি | |
| Android App |
২। কম্পিউটার এর সাথে USB to Serial Converter কানেক্ট করতে হবে।
৩। DPDT সুইচকে PROG এর দিকে রাখতে হবে।
৪. এবার FLASH বাটন চেপে ধরে রাখতে হবে, অতপর RESET বাটন ১ বার প্রেস করে FLASH বাটন ছেড়ে দিন। Orange LED (G0) হাল্কা জ্বলে থাকবে।
ESP8266 Controller Final.apk ফাইলটি মোবাইলে ইন্সটল করতে হবে । তারপর সেখানে Set IP Address এ ক্লিক করে Current IP এর যায়গায় আপনার ডিভাইসটি কানেক্ট হওয়ার ফলে যে IP Address পাবে তা দিতে হবে। একবার IP Address দিয়ে Save দিলে পরবর্তী ব্যবহারের সময়ে আর Set IP Address দিতে হবে না।
ডিভাইসটির সাথে একটি USB Mini Cable আছে। যা দিয়ে শুধু মাত্র 5V পাওয়ার দেওয়া হয়ে থাকে।
*Arduno IDE ও ESP8266 দিয়ে কিভাবে প্রোগ্রামিং করবেন তা এই টিউটোরিয়াল টি পড়ে দেখুন। কোডঃ Wifi Name এর পরিবর্তে রাউটের নাম ও Wifi Pasword এর পরিবর্তে রাউটারের পাসওয়ার্ড দিয়ে কম্পাইল করে আপলোড দিতে হবে।#include <ESP8266WiFi.h>
const char* ssid = "Wifi Name"; // Wifi Name
const char* password = "Wifi Password"; // Wifi Password
int GPIO0=D3;
int GPIO2=D4;
WiFiServer server(80); // Creates a server that listens for incoming connections on the specified port, here in this case port is 80.
void setup() {
Serial.begin(115200);
delay(10);
pinMode(GPIO0, OUTPUT);
pinMode(GPIO2, OUTPUT);
digitalWrite(GPIO0,HIGH);
digitalWrite(GPIO2,HIGH);
// Connect to WiFi network
Serial.println();
Serial.println();
Serial.print("Connecting to ");
Serial.println(ssid);
WiFi.begin(ssid, password);
while (WiFi.status() != WL_CONNECTED) {
delay(500);
Serial.print(".");
}
Serial.println("");
Serial.println("WiFi connected");
// Start the server
server.begin();
Serial.println("Server started");
// Print the IP address
Serial.print("Use this URL to connect: ");
Serial.print("http://");
Serial.print(WiFi.localIP()); //Gets the WiFi shield's IP address and Print the IP address of serial monitor
Serial.println("/");
}
void loop() {
// Check if a client has connected
WiFiClient client = server.available();
if (!client) {
return;
}
// Wait until the client sends some data
Serial.println("new client");
while(!client.available()){
delay(1);
}
// Read the first line of the request
String request = client.readStringUntil('\r');
Serial.println(request);
client.flush();
// Match the request
if (request.indexOf("ON1") != -1) {
digitalWrite(GPIO0,LOW);
client.println("HTTP/1.1 200 OK");
client.println("Content-Type: text/html");
client.println("");
client.println("<!DOCTYPE HTML>");
client.println("<html>");
client.println("Relay 1 is ON");
client.println("</html>");
client.stop();
delay(1);
}
if (request.indexOf("OFF1") != -1) {
digitalWrite(GPIO0, HIGH);
client.println("HTTP/1.1 200 OK");
client.println("Content-Type: text/html");
client.println("");
client.println("<!DOCTYPE HTML>");
client.println("<html>");
client.println("Relay 1 is OFF");
client.println("</html>");
client.stop();
delay(1);
}
if (request.indexOf("ON2") != -1) {
digitalWrite(GPIO2,LOW);
client.println("HTTP/1.1 200 OK");
client.println("Content-Type: text/html");
client.println("");
client.println("<!DOCTYPE HTML>");
client.println("<html>");
client.println("Relay 2 is ON");
client.println("</html>");
client.stop();
delay(1);
}
if (request.indexOf("OFF2") != -1) {
digitalWrite(GPIO2, HIGH);
client.println("HTTP/1.1 200 OK");
client.println("Content-Type: text/html");
client.println("");
client.println("<!DOCTYPE HTML>");
client.println("<html>");
client.println("Relay 2 is OFF");
client.println("</html>");
client.stop();
delay(1);
}
}
ফলাফলঃ
App টি ইন্সটল করে নিতে হবে।
App Installation:
]]>