আজকের টিউটোরিয়ালে Raspberry Pi Pico দিয়ে TFT ডিসপ্লে চালানোর পদ্ধতি সম্পর্কে আলোচনা করবো। এর জন্য প্রয়োজন TFT Display এবং Raspberry Pi Pico। এই ডিসপ্লের মধ্যে গ্রাফিক্স, টেক্সট, অ্যানিমেশনসহ সকল কিছু প্রিন্ট করা যাবে। রাস্পবেরি পাই পিকো ‘র মোট পাঁচটি GPIO পিনের প্রয়োজন হবে। টিউটোরিয়ালে দেখানো TFT ডিসপ্লেটি ১.৮ ইঞ্চি এবং SPI কমিউনিকেশনে কাজ করে। ভিন্ন সাইজের SPI ডিসপ্লেতেও একই রকম ভাবে কাজ করবে।
Raspberry Pi Pico

TFT LCD Display
ডিসপ্লেতে প্রিন্ট করার জন্য যে পিন গুলো দরকার হবে তা হলো, CS, RST, RS, SDA and CLK. এই টিউটোরিয়ালে SD কার্ড অংশটুকু প্রয়োজন নেই। শুধুমাত্র ডিসপ্লে পিনের কানেকশন হলেই হবে।
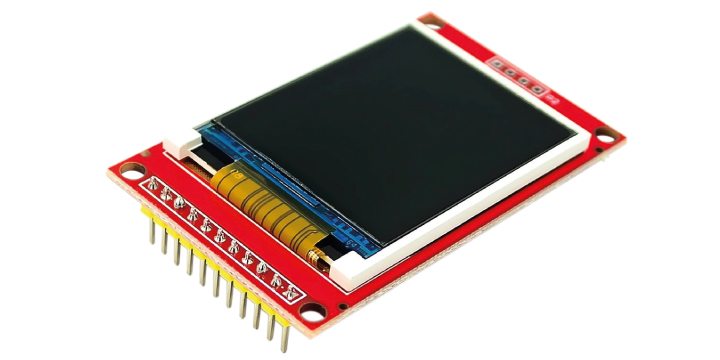
পাওয়ারঃ ডিসপ্লের পাওয়ার সাপ্লাই এবং ডাটা পিন সবগুলোই ৩.৩ ভোল্টের। সুতরাং এই ভোল্টেজের অতিরিক্ত ভোল্টেজ এপ্লাই করলে ডিসপ্লে নস্ট হয়ে যাবে। ডিসপ্লের VCC পিনের নিচে ৩টা NC পিন রয়েছে, যা কোন ধরণের সংযোগের প্রয়োজন নেই।
স্পেসিফিকেশনঃ
- রেজুলেশনঃ 128 x 160 পিক্সেল
- LCD ড্রাইভারঃ ST7735
- সাপ্লাই ভোল্টেজঃ ৩.৩ ভোল্ট
- লাইব্রেরী সাপোর্টঃ Adafruit_ST7735
- কার্ড স্লটঃ Micro SD Card
- ডিসপ্লে সাইজঃ ১.৮ ইঞ্চি
- বোর্ড সাইজঃ ২.৪৬ ইঞ্চি x ১.৫ ইঞ্চি
প্রয়োজনীয় কম্পোনেন্টঃ
এক্সপেরিমেন্ট করতে যে সকল কম্পোনেন্ট প্রয়োজন হবে, তার নাম পরিমাণ ও লিংকসহ তালিকা।
| ক্রমিক নং | কম্পোনেন্টের নাম | পরিমাণ | লিংক |
| ১ | Raspberry Pi Pico | ১টি | কম্পোনেন্ট লিংক |
| ২ | Micro USB Data Cable | ১টি | কম্পোনেন্ট লিংক |
| ৩ | Breadboard (830 Point) | ১টি | কম্পোনেন্ট লিংক |
| ৪ | TFT LCD Display Module 1.8 inch |
১টি | কম্পোনেন্ট লিংক |
| ৫ | Jumper Wire | প্রয়োজন মত | কম্পোনেন্ট লিংক |
সঠিক কানেক্টিভিটির জন্য সিলিকনের জাম্পার ওয়্যার অধিকগুণে ভালো। সব ধরণের Jumper Wire এই লিংকে পাওয়া যাবে। এক্সপেরিমেন্ট করতে ৭টি মেইল টু মেইল জাম্পার ওয়্যার প্রয়োজন হবে।
Raspberry Pi Pico with Header দেখতে এখানে ক্লিক করুন।
সার্কিট কানেকশন
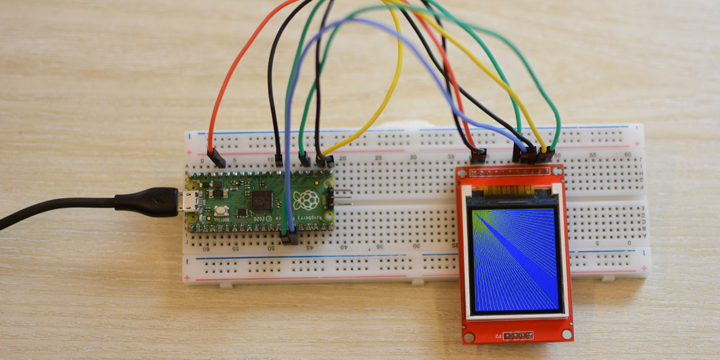
রাস্পবেরি পাই পিকো’র সাথে TFT ডিসপ্লের SPI কানেকশন।

| Raspberry Pi Pico |
TFT LCD Display Module 1.8 inch |
| GP18 | CS |
| GP17 | RST |
| GP16 | RS |
| GP11 | SDA |
| GP10 | CLK |
| GND | GND |
| 3V3 (OUT) | 3.3V |
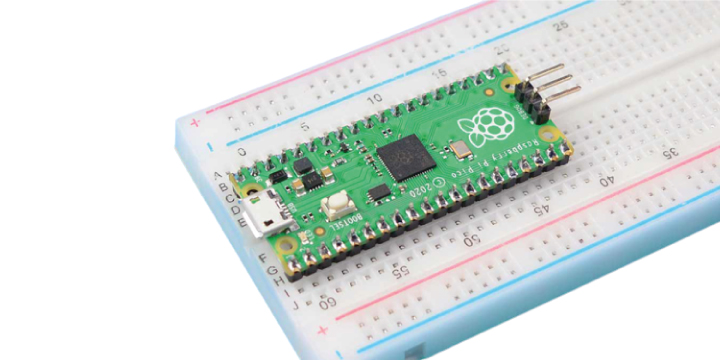
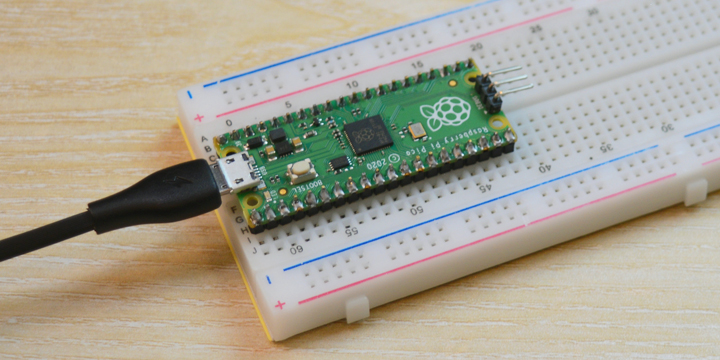
কানেকশনের ক্ষেত্রে একটি ৮৩০ পয়েন্টের Breadboard নিতে হবে। অথবা ছোট সাইজের দুইটিও নেওয়া যেতে পারে। এরপর রাস্পবেরি পাই পিকো বসিয়ে নিতে হবে। নিচের ছবি অনুযায়ী ডিসপ্লে বসিয়ে নিবো। এরপর সার্কিট ডায়াগ্রাম দেখে কানেকশন দিবো।
লাইব্রেরী ইন্সটলেশনঃ
এই এক্সপেরিমেন্টের জন্য দুটি লাইব্রেরী প্রয়োজন হবে। লাইব্রেরীগুলো Thonny IDE দিয়ে ওপেন করবো। Thonny IDE কিভাবে ডাউনলোড করতে হয় কিংবা এটির ব্যবহার জানতে আমাদের Raspberry Pi Pico প্রোগ্রামিং ব্লগটি দেখতে পারেন।
শুরুতে লাইব্রেরীগুলো ডাউনলোড করে নিতে হবে। এরপর রাস্পবেরি পাই পিকো’তে তে Save করতে হবে। এরপর মূল প্রোগ্রাম আপলোড করতে হবে। লাইব্রেরী সেভ করার পদ্ধতি নিচের কয়েকটি চিত্রে দেখানো হলো।
ডাউনলোডকৃত ফাইল Thonny IDE দিয়ে ওপেন করে Save as… ক্লিক করবো।

এরপর “Where to save to?” Window তে Raspberry Pi Pico সিলেক্ট করবো। [যেহেতু লাইব্রেরী ফাইলটি কম্পিউটারে ডাউনলোড হয়েছিলো, এখন সেটিকে রাস্পবেরি পাই পিকো’তে Save করে নিচ্ছি]
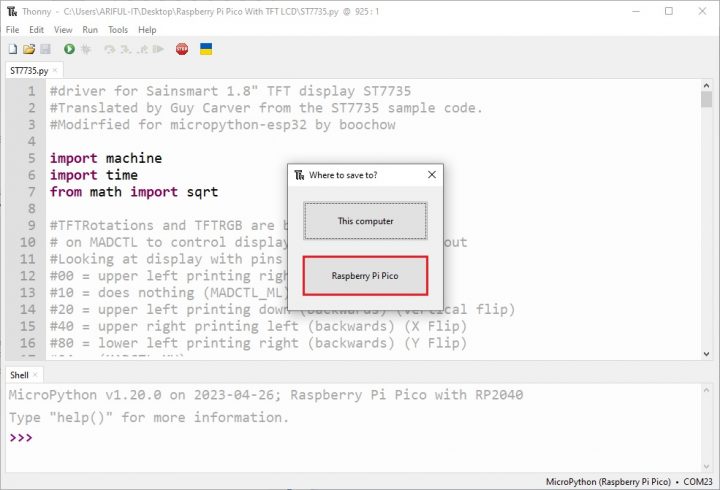
অতপর ST7735.py দিয়ে Save করবো। এখানে লাইব্রেরীর নাম পরিবর্তন করা যাবে না।

একই নিয়মে sysfont লাইব্রেরীটিও রাস্পবেরি পাই পিকো’তে Save করে নিতে হবে।
TFT কোড
from ST7735 import TFT
from sysfont import sysfont
from machine import SPI,Pin
import time
import math
spi = SPI(1, baudrate=20000000, polarity=0, phase=0,
          sck=Pin(10), mosi=Pin(11), miso=None)
tft=TFT(spi,16,17,18)
tft.initr()
tft.rgb(True)

def testlines(color):
    tft.fill(TFT.BLUE)
    for x in range(0, tft.size()[0], 6):
        tft.line((0,0),(x, tft.size()[1] - 1), color)
    for y in range(0, tft.size()[1], 6):
        tft.line((0,0),(tft.size()[0] - 1, y), color)

    tft.fill(TFT.BLACK)
    for x in range(0, tft.size()[0], 6):
        tft.line((tft.size()[0] - 1, 0), (x, tft.size()[1] - 1), color)
    for y in range(0, tft.size()[1], 6):
        tft.line((tft.size()[0] - 1, 0), (0, y), color)

    tft.fill(TFT.BLACK)
    for x in range(0, tft.size()[0], 6):
        tft.line((0, tft.size()[1] - 1), (x, 0), color)
    for y in range(0, tft.size()[1], 6):
        tft.line((0, tft.size()[1] - 1), (tft.size()[0] - 1,y), color)

    tft.fill(TFT.BLACK)
    for x in range(0, tft.size()[0], 6):
        tft.line((tft.size()[0] - 1, tft.size()[1] - 1), (x, 0), color)
    for y in range(0, tft.size()[1], 6):
        tft.line((tft.size()[0] - 1, tft.size()[1] - 1), (0, y), color)

def testfastlines(color1, color2):
    tft.fill(TFT.BLACK)
    for y in range(0, tft.size()[1], 5):
        tft.hline((0,y), tft.size()[0], color1)
    for x in range(0, tft.size()[0], 5):
        tft.vline((x,0), tft.size()[1], color2)

def testdrawrects(color):
    tft.fill(TFT.BLACK);
    for x in range(0,tft.size()[0],6):
        tft.rect((tft.size()[0]//2 - x//2, tft.size()[1]//2 - x/2), (x, x), color)

def testfillrects(color1, color2):
    tft.fill(TFT.BLACK);
    for x in range(tft.size()[0],0,-6):
        tft.fillrect((tft.size()[0]//2 - x//2, tft.size()[1]//2 - x/2), (x, x), color1)
        tft.rect((tft.size()[0]//2 - x//2, tft.size()[1]//2 - x/2), (x, x), color2)


def testfillcircles(radius, color):
    for x in range(radius, tft.size()[0], radius * 2):
        for y in range(radius, tft.size()[1], radius * 2):
            tft.fillcircle((x, y), radius, color)

def testdrawcircles(radius, color):
    for x in range(0, tft.size()[0] + radius, radius * 2):
        for y in range(0, tft.size()[1] + radius, radius * 2):
            tft.circle((x, y), radius, color)

def testtriangles():
    tft.fill(TFT.BLACK);
    color = 0xF800
    w = tft.size()[0] // 2
    x = tft.size()[1] - 1
    y = 0
    z = tft.size()[0]
    for t in range(0, 15):
        tft.line((w, y), (y, x), color)
        tft.line((y, x), (z, x), color)
        tft.line((z, x), (w, y), color)
        x -= 4
        y += 4
        z -= 4
        color += 100

def testroundrects():
    tft.fill(TFT.BLACK);
    color = 100
    for t in range(5):
        x = 0
        y = 0
        w = tft.size()[0] - 2
        h = tft.size()[1] - 2
        for i in range(17):
            tft.rect((x, y), (w, h), color)
            x += 2
            y += 3
            w -= 4
            h -= 6
            color += 1100
        color += 100

def tftprinttest():
    tft.fill(TFT.BLACK);
    v = 30
    tft.text((0, v), "Hello World!", TFT.RED, sysfont, 1, nowrap=True)
    v += sysfont["Height"]
    tft.text((0, v), "Hello World!", TFT.YELLOW, sysfont, 2, nowrap=True)
    v += sysfont["Height"] * 2
    tft.text((0, v), "Hello World!", TFT.GREEN, sysfont, 3, nowrap=True)
    v += sysfont["Height"] * 3
    tft.text((0, v), str(1234.567), TFT.BLUE, sysfont, 4, nowrap=True)
    time.sleep_ms(1500)
    tft.fill(TFT.BLACK);
    v = 0
    tft.text((0, v), "Hello World!", TFT.RED, sysfont)
    v += sysfont["Height"]
    tft.text((0, v), str(math.pi), TFT.GREEN, sysfont)
    v += sysfont["Height"]
    tft.text((0, v), " Want pi?", TFT.GREEN, sysfont)
    v += sysfont["Height"] * 2
    tft.text((0, v), hex(8675309), TFT.GREEN, sysfont)
    v += sysfont["Height"]
    tft.text((0, v), " Print HEX!", TFT.GREEN, sysfont)
    v += sysfont["Height"] * 2
    tft.text((0, v), "Sketch has been", TFT.WHITE, sysfont)
    v += sysfont["Height"]
    tft.text((0, v), "running for: ", TFT.WHITE, sysfont)
    v += sysfont["Height"]
    tft.text((0, v), str(time.ticks_ms() / 1000), TFT.PURPLE, sysfont)
    v += sysfont["Height"]
    tft.text((0, v), " seconds.", TFT.WHITE, sysfont)

def test_main():
    tft.fill(TFT.BLACK)
    tft.text((0, 0), "TechShopBD was a popular online retailer and distributor of various electronics and tech-related products based in Bangladesh. They offered a wide range of products, including computer components, peripherals, accessories, and other gadgets. TechShopBD was known for providing a convenient platform for tech enthusiasts, hobbyists, and professionals to purchase electronic components, development boards, sensors, tools, and other equipment for their projects or personal use. ", TFT.WHITE, sysfont, 1)
    time.sleep_ms(1000)

    tftprinttest()
    time.sleep_ms(4000)

    testlines(TFT.YELLOW)
    time.sleep_ms(500)

    testfastlines(TFT.RED, TFT.BLUE)
    time.sleep_ms(500)

    testdrawrects(TFT.GREEN)
    time.sleep_ms(500)

    testfillrects(TFT.YELLOW, TFT.PURPLE)
    time.sleep_ms(500)

    tft.fill(TFT.BLACK)
    testfillcircles(10, TFT.BLUE)
    testdrawcircles(10, TFT.WHITE)
    time.sleep_ms(500)

    testroundrects()
    time.sleep_ms(500)

    testtriangles()
    time.sleep_ms(500)

test_main()
TFT Code টি একই নিয়মে রাস্পবেরি পাই পিকো’তে Save করতে হবে। এরপর Run করতে হবে।
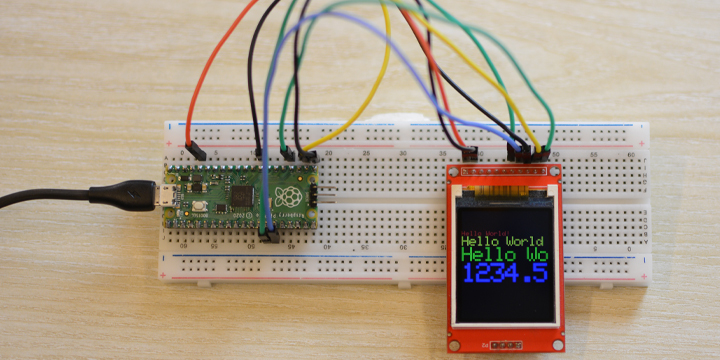
আউটপুট
প্রোগ্রাম আপলোডের পর শুরুতে কিছু টেক্সট দেখাবে এরপর গ্রাফিক্স অ্যানিমেশন হবে।
